Sunday, May 15, 2022

How To Create Your Own Protective Face Masks, EASY No Sewing Face Mask Pattern Template

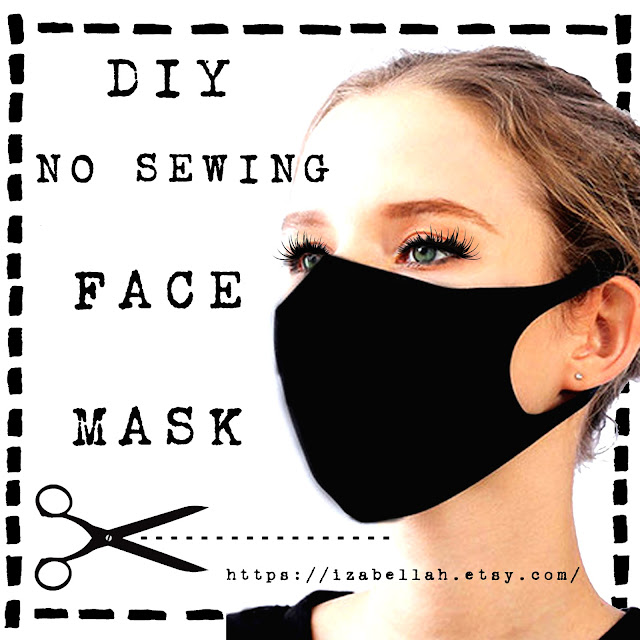
 Easy no sew Face Mask Pattern Printable Digital Download

Face Mask Pattern, Easy No Sewing, DIY, Washable, Adjustable, Reversible Anti Dust, Allergies Digital Download Printable Face Mask Barrier


Digital Download Pattern in my Etsy Shoppe HERE


DIY Easy No Sewing Pattern Face Mask. May be washable, adjustable and reversible.

This is a Digital Download File. No physical product will be delivered. DIY Printable Pattern.

Instructions, hints & tips will be provided with download. You select your own colors and materials. The best masks are constructed of two layers of heavyweight "quilters cotton" with a thread count of at least 180, and have a thicker and tighter weave. You can also use neoprene, t shirts, flannels, cotton or jersey materials.

File Type: JPG
Letter Size Paper

These files are for personal use only. Digital files may not be shared, sold, or transferred.
All Sales final. No returns or exchanges.

Disclaimer: This is not a replacement for medical grade supplies. The mask should not be used in any surgical setting or significant exposure to liquid, bodily or other hazardous fluids, may be expected, or in a clinical setting where the infection risk level through inhalation exposure is high. This mask pattern makes no warranties, either express or implied, that the mask prevents infection or the transmission of viruses or diseases.

You can purchase this easy digital download pattern in my etsy shoppe velvet & rust

Saturday, November 7, 2020

Are You Searching for a New Fun Side Hustle to add to your job list, Become and Independent Color Street Nail Stylist


Are You Looking For a Fun Side Hustle? 

I ab~soul~utely LOVE to hustle! I have the need to stay busy. I thrift and resell on Mercari, Poshmark and Etsy, I have successful been doing it for years.

But just recently, I have added yet another fun way to earn money to my list. I joined Color Street as an Independent Stylist!! If you haven’t heard of that, they are real 100% nail polish strips that you stick on your nails with no dry time and they last for 10-14 days! I’m so impressed with this product. They offer so many fun colors and patterns. The new Fall collection just came out and they are beautiful! If you are interested in Joining my Team, the Compensation Plan is pretty darned amazing with a possible paycheck once a week, bonus's and prizes in the mix. It's been a fun new adventure for me! Please reach out to me at any of the below links if you have burning questions :)

Join My VIP Color Street Facebook Group

Shop my color street website

Become a color street stylist

My Pretty Little Nails Facebook Business Page

Thanks for taking time to check out my blog!


Wednesday, November 4, 2020

Hint & Tips For The Best and Longest Application of Color Street Nail Polish Strips

*This post may contain affiliate links. I may receive a small bonus when you purchase from my links, which I totally blow on coffee & lovely little things:)** Oh & most importantly, I only recommend products that I would personally use myself. "As an Amazon Affiliate Associate I earn from qualifying purchases" So please feel free to click away :)*


Color Street Nail Polish Hints & Tips for the best application.

Be sure to push back cuticles, the nails strips will not dry to your cuticles. Wipe your finger nail tips with alcohol pads before application, make sure it's fully dry so that you reduce the oil transferring on to the sets as you apply.
 
Apply when you have some free time to sit back & relax. Create this to be a "Self Care time." Even though the nail polish strips are completely dry, the adhesive needs about 3 hours to fully cure. If you wait to apply before bed it will give you a lot of time for it to cure while you are sleeping.
 
Avoid hot water or a lot of hand washing before the nail strips have fully cured.  Allow at least 30- 40 minutes curing time. Even though they will stay on, you will get more tip wear and wear along the nail bed.
 
When you are using a file to cut down the strips, make sure it's in a down motion, not side to side, also angle it so that you give some left over on the ends of your tips. The nail polish sets do shrink a bit like regular nail polish does after application. If you angle the file too far toward your nails then you will end up looking like you already got tip wear on the first day.
 
Solids are thinner and need more care when applying. I suggest buffing your nails a bit (just do not shine or the strips will not adhere as easily), and if you have ridges on your nails you can also apply a ridge filler base coat to even out your nails first.
 
The strips already have a top coat on them, but some of them are shinier than others. If you love that gel look, I have 2 great products that I personally LOVE to use! Applying a Gel Like glossy look you can try Sally Hansen Miracle Gel Nail Polish Top Coat THIS stuff is amazing and helps your mani last even longer than usual!! 

The other product is a quick drying top coat, you can apply on top of the nail

strips,  Poshe Super Fast Drying Top Coat this products gives it a nice glossy look. 

The last product I love to use on occassion is a Matte Top coat. If you prefer your nails to that look & style is I love to use this OPI Nail Polish and Nail Laquer Top Coat, Matte Finish Top Coat 

 
You can also wrap the top of the nail strips over the tips of your nails and that too will give you a longer wear time, you don't have to try that method but it looks great with the solid colored strips. 

Give your nails a full 24 hour naked time in between sets to allow your nails to breathe and reset. Give them some love and attention with lotions, conditioning or nail oils, but be sure that you use the alcohol wipes before your next application.
 
I mainly post in my Facebook VIP group with more tips & tricks on application techniques, nailfies, games, prizes and pure silliness & fun posts! So please feel free to join me and the gang over there, it is a fun place to hang out :) 
If you would like to try some free samples please join in at my VIP group and send me a quick message. You can find my Color Street VIP FB Group here:  https://www.facebook.com/groups/1040171683099478

If you don't have a stylist already feel free to peruse the new catalog here: https://www.colorstreet.com/izabelladrayven


Tuesday, October 27, 2020

FREE Samples Color Street Nail Polish Strips Available Now


FREE COLOR STREET NAIL SAMPLES

I am so excited about these nails that I cannot wait to share them with others! The first time I tried a sample from a friend I was immediately in love!! I am happy to send out a free sample to you if you are interested. Just come on over to my Facebook VIP group here. I love sharing these wonderful little gems, with anyone who loves doing there nails!

You can also shop my website, right now there is a great offer Buy 3 Get 1 Free!!


Color Street Nail Polish Strips, Buy 3 Get 1 Free, 2020 Fall Winter Catalog Now Available


Feel free to peruse the new 2020 Fall / Winter Catalog! So many amazing colors, but wow some can sell out so quickly!

Note: There is a Buy 3 Get 1 Free Offer 


Wednesday, July 15, 2020

Handmade Cotton Face Mask, Washable Reusable, USA Made, Unisex Adult Fashionable Cute Face Covering, Soft Fabric Black

Handmade face mask available in my Etsy Shoppe 

Please purchase here


Handcrafted & Lovingly created Black Face Mask. USA Made, Ready to Ship, Fast Shipping!
Simple and comfortable, handmade, cotton Fabric Face Mask, Reversible Washable Reusable.

This listing is for ONE { 1 } face mask.

One Size Fits All // Unisex Adult. Please see photos for approx measurements.

Washable & Comfortable. Relaxed Fit, Soft & Stretchy Material.

Fabric is Pre Washed and dried before construction. Masks are created in a clean environment. We are constantly disinfecting our working space and taking all necessary precautions.

This mask is reusable and washable. Washing at least once daily. Hand-washing is strongly recommended.

SHIPPING: After Payment clears, it takes me 1-3 days to get your order packaged and shipped. Ships through USPS first class mail (2-6 days). Please be prepared for unforseen delays in shipping that could occur.

These are not medical grade masks, it is not a replacement for n95.
This mask does not have a filter or wire. Face coverings should be used with layers or medical masks or masks underneath.

For hygienic reasons, returns are not accepted.

I also have other face mask available in my Etsy Shoppe along with Digital Download Face Mask Patterns here

DIY Easy No Sew Face Mask Pattern Template, How To Make Your Own Easy Face Mask No Sewing Pattern DiY Digital Download Printable Pattern

DIY Easy No Sewing Face Mask Pattern, Washable, Adjustable, Reversible Anti Dust, Allergies Digital Download Printable Face Mask Barrier


Digital Download Pattern in my Etsy Shoppe
here 

DIY Easy No Sewing Pattern Face Mask. May be washable, adjustable and reversible.

This is a Digital Download File. No physical product will be delivered. DIY Printable Pattern.

Instructions, hints and tips will be provided with download. You select your own colors and materials. The best masks are constructed of two layers of heavyweight "quilters cotton" with a thread count of at least 180, and have a thicker and tighter weave. You can also use neoprene, tshirts, flannels, cotton or jersey materials.

File Type: JPG
Letter Size Paper


Disclaimer: This is not a replacement for medical grade supplies. The mask should not be used in any surgical setting or significant exposure to liquid, bodily or other hazardous fluids, may be expected, or in a clinical setting where the infection risk level through inhalation exposure is high. This mask pattern makes no warranties, either express or implied, that the mask prevents infection or the transmission of viruses or diseases.


You can purchase this easy digital download pattern in my Etsy shoppe here

Saturday, April 4, 2020

How To Make Your Own Easy Face Mask, No Sewing Pattern, DiY Digital Download Printable Pattern

Easy no sew Face Mask Pattern Printable Digital Download

Face Mask Pattern, Easy No Sewing, DIY, Washable, Adjustable, Reversible Anti Dust, Allergies Digital Download Printable Face Mask Barrier


Digital Download Pattern in my Etsy Shoppe HERE


DIY Easy No Sewing Pattern Face Mask. May be washable, adjustable and reversible.

This is a Digital Download File. No physical product will be delivered. DIY Printable Pattern.

Instructions, hints & tips will be provided with download. You select your own colors and materials. The best masks are constructed of two layers of heavyweight "quilters cotton" with a thread count of at least 180, and have a thicker and tighter weave. You can also use neoprene, tshirts, flannels, cotton or jersey materials.

File Type: JPG
Letter Size Paper

Please do not share files, I am trying to create some income to pay bills. These files are for personal use only. Digital files may not be shared, sold, or transferred.
All Sales final. No returns or exchanges.

Disclaimer: This is not a replacement for medical grade supplies. The mask should not be used in any surgical setting or significant exposure to liquid, bodily or other hazardous fluids, may be expected, or in a clinical setting where the infection risk level through inhalation exposure is high. This mask pattern makes no warranties, either express or implied, that the mask prevents infection or the transmission of viruses or diseases.

You can purchase this easy digital download pattern in my etsy shoppe velvet & rust


Thursday, April 2, 2020

How to create Your Own Zine DIY Self Publishing Printing

How to create a zine self publishing mixed media art


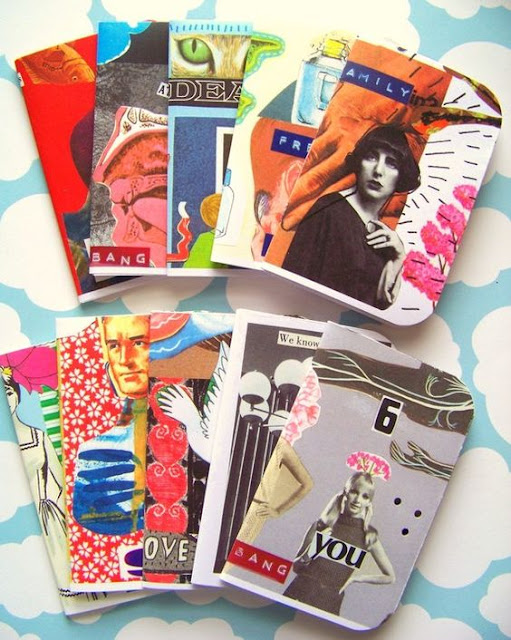
Zines (pronounced 'zeens', shortened from the word 'magazines') are small independent publications. Fun and easy to make, they are a great way to get your ideas across and to share your voice so it is heard in a creative form.

Before there were blogs, there were zines and before there was print on demand books, there were zines. What’s important, is the mere fact of creating, design it, paste it, scan it, print it, then distribute it and or hand it out. Whatever comes natural to you. Design your own publication to reflect the craziness and calmness of your life,  or whatever it is around you that you would like to share with others. Enjoy the ride and thrill of self publication of your own zine, it's all about self expression and creativity.

How To Make A Make a 12-page (10 pages plus a front and back cover), 8.5' x 5.5' zine.

+ Start by taking three pieces of regular sized computer paper, fold them in half horizontally, and hold them sideways like a book.

+ Next pick your subject(s). It doesn't need to be all on one topic. You can have a different topic on every page if you want. Some popular topics are: art zines, photography, poetry, cooking, recipes, self help, diy, psychic, paranormal, discoveries, history, stories, polls, video game tips, talking about a band you like, comics, artwork, recipes, fashion tips, local news, and politics.

+ Pick a title. A good title is short, to the point, and easy to remember.

+ Start looking at the layout. You can do the write-ups by drawing, collaging by hand or on the computer, as long as it all fits on your page size.

+ Make your master copy. This will be what you use to make copies from. Everything should be firmly fastened down and the way you want it to look like.

+ Start making copies. The easiest and cheapest way to print up a zine is usually a making 'two-sided copies;' i.e., you're copying both sides of a master sheet onto both sides of a blank sheet.

+ Possible Extra Supplies
Stapler
Comics
Crayons
Stickers
Magazines
Glue sticks
Washi Tape
Rubber stamps
Colored pencils
Scrapbook Papers
Old Postage Stamps
Security envelope linings
+ Start handing out your wonderful creations, or upload online. Or find others' who love to trade zine for zine :)

You can also research how to Create Digital Download Zines

How to create your own zine Self Publish Mixed Media Art


How to create your own zine Self Publish Mixed Media Art

How to create your own zine Self Publish Mixed Media Art


How to create your own zine Self Publish Mixed Media Art Etsy

How to create your own zine Self Publish Mixed Media Art Etsy


Velvet and Rust Etsy Shoppe


DIY How To Make Your Own Beads Mixed Media Handmade Fiber Beads


 Mixed Media Fiber Art Beads DiY

DIY beads come in many different forms & flavors. You can experiment with all types of materials, drinking straws, paper, tyvek, fabric, threads, epoxy clay, polymer clay, wool, felt, acrylic felt and various types of wire. My beads have been varnished, glued, baked, wrapped, painted, gilded, mica powdered, heat distressed, coated with resin. DiY beads are so easy and fun to create, the results are endless :)

Here is how to create fiber beads. First gather your materials...

* drinking straws and or other base materials
* white glue
* scissors
* muslin, tapestry, nearly any cotton blend material
* acrylic paints
* 22 gauge wires ~gold copper silver
* needle nose pliers
* wire cutters
* beads, charms & glitter!!

Tear/cut your muslin or cotton materials 1/2 to 1 1/2 inch strips, this will be the width of your beads. You will want different sizes of beads. Cut your strips to about 6 to 12 inches long (experimentation is best)

Proceed to wrap the material around the end of the straw, adding the white glue onto the material as you wrap it around the straw. Make sure it is glued securely & then cut the straw leaving some still within the middle of the wrap. You can usually get 3 beads per straw depending on length of the beads you create.

Now let the fun begin!!

Paint metallic paints on the material & ends. Wrap fibers or yarn around the bead. Wrap wire pieces 5 to 6 inches long, around the fibers or yarn to hold it in place. You can also add beads & charms to the wire, then add glitter or try dipping the beads in embossing powders!!

Have fun creating!!!

Izabella - Velvet + Rust Etsy Shoppe here


Wednesday, April 1, 2020

Lily Elsie Le Belle Epoque Beauty Velvet & Rust Etsy Antique Digital Download Collage Sheets


Lily Elsie Beauties of le Belle Epoque

Lily Elsie had a flawless face, true perfection in my estimation. She was one of the most photographed women of Le Belle Epoque. She was born Elsie Hodder on April 8, 1886 in Leeds, Yorkshire, England. On her birth certificate, her mother, Elizabeth Hodder, was listed as a dressmaker. There was no father recorded. Then in 1891 her mother married William Cotton and Elsie took the Cotton name at that time. William Cotton gave his occupation as a theatrical baggage master. By the 1901 census Elizabeth Cotton the dressmaker was listed as an actress. Elsie herself began acting as a child and soon the precocious yet painfully shy child became known as Little Elsie in the world of music hall and theatrical entertainment. She traveled from theater to theater throughout England as she grew starring in many popular shows of the period including, The Arabian Nights, Little Red Riding Hood,  King Klondike,  as Aerielle, the Spirit of the Air, McKenna's Flirtation, Dick Whittington, The Forty Thieves, Blue Beard, The Silver Slipper and the Three Little Maids. From about 1900 she adopted the name "Lily Elsie", not too different from her previous Little Elsie. Having grown into a beautiful young woman, Elsie joined a company at Daley's Theater in London as a chorus girl. Soon she was acting again appearing in fourteen musicals from 1900 to 1906.

Real success did not come to Elsie until she appeared in the starring role in The Merry Widow at the operetta's London premiere in June 1907. The hit show ran for 778 performances at Daley's Theater. The show was a triumph as was Lily Elsie. Overnight she had become a legend. Her face was soon featured on many products  and advertisements from chocolate and biscuit tins to cosmetics. Magazines produced special supplements about her. Clothing designers sold more when their garments were associated with Miss Lily Elsie. Every fashionable woman of the time wanted the plumed hats she wore in The Merry Widow so much so that they became an extraordinary fad. After The Merry Widow, Elsie appeared in 16 more shows always receiving many accolades.

Many of the most prominent, wealthy would-be suitors, mostly from the nobility of London, were met with a casual and elusive disinterest that just fueled her beguiling sense of mystery and nevertheless, did not stop them from sending her the most exquisite gifts of jewelry emblazoned in diamonds and rubies and more. Elsie was quoted as saying, "I have never been fool enough to give my heart to one of them, and so they think it must be worth having!" and "I'm always rude to men. And the ruder I am the more they like me!"

After just a few short years of fame, Elsie married Major Ian Bullough, the twenty-six year old son of a millionaire textile manufacturer in November 1911 and relished spending time out of the public eye. She did return to the stage periodically for roles in Malvourneen, The Admiral Crichton, and Pamela. She appeared in 2 films, in 1918 a cameo in The Great Love with Lillian Gish, and in 1919 in the silent movie Comradeship. Then in 1920 she and her husband moved to a village in Gloucestershire for a number of years away from the stage enjoying social events and fox hunting. In 1927 she appeared in The Blue Train and in 1928 her last show,The Truth Game. Her health was said to have been poor throughout her life and she reportedly had several operations during her life on stage. She found the eight performances a week of The Merry Widow especially grueling and found excuses for not appearing in matinees. She was said to have become "difficult". Speculation exists about possible problems with anemia and/or an early onset menopause at age 22. Her husband had problems with alcoholism. She and her husband divorced in 1930.

In her later years she was said to have become a hypochondriac and spent much of her time in nursing homes and Swiss sanatorium. She was said to have become so quarrelsome that even her most devote supporters left her. Luckily, she had the finances to be cared for in style for the rest of her life. Her mental health seriously deteriorated to the point that she underwent brain surgery, a frontal lobotomy, a practice common at the time but since then considered barbaric. She spent the last two years of her life living at St. Andrew's Hospital in London happy in her anonymity. She died December 16, 1962 at age 76 of heart failure and broncha pneumonia.

"Lily Elsie" was the stage name of Elsie (Hodder) Burroughs. She was born to Charlotte Elizabeth Hodder on 8 April 1886. When her mother married William Thomas Cotton in 1891, Elsie took his name, becoming Elsie Cotton.


Below are Digital Download Collage sheets available here: Velvet & Rust 


 Digital Collage Sheets velvet and rust 
Etsy shoppe 


Series #3 written by Maureen Tillman // co produced by Izabella Blue